What is a Thermal Pack? (If Not Previously Installed)
On campers built in 2002 or newer, there will be a strip of Velcro attached at the top of the pop-up soft walls during construction of the camper. Another strip of Velcro needs to be added to the upper portion of the camper walls (on the interior hard walls of the camper) if your camper does not already have the lower Velcro strip.
| Material | Characteristics | Care |
| Polypropylene nonwoven fabric (olefin fiber) | Good abrasion resistance | Fabrics made of Olefin should be spot cleaned or gently hand washed in cold water |
| Dries quickly and carries moisture away | ||
| Lightweight - The low density of olefin makes it very lightweight | Olefin fabrics should be air dried | |
| Good thermal retention - Olefin helps keep you warm by trapping the air in the space between the layers |
How to Install a Thermal Pack
To attach the Thermal Pack, a strip of Velcro is sewn to a vinyl panel and attached to the camper roof, on the interior, Another strip is attached to the upper portion of the camper body (on the interior walls of the camper). The Thermal Pack has matching sewn Velcro strips on each panel that hold the panels in place.
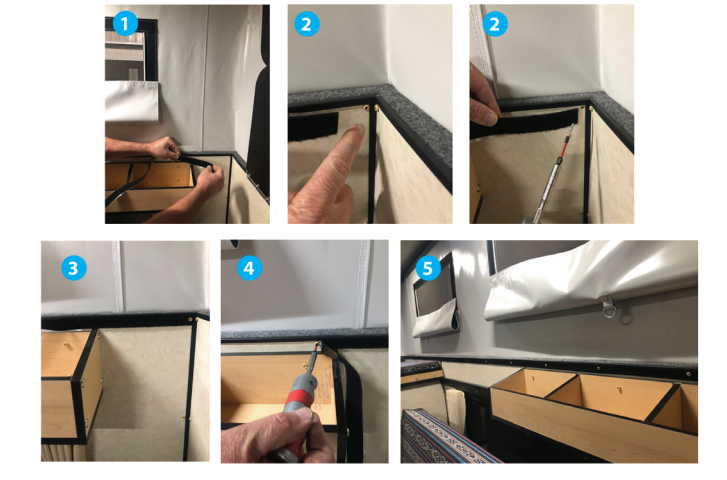
Applying the Lower Velcro Strips to Camper Walls:
- Remove the Velcro strips from bag (if you ordered it from us).
- Mark existing wall screw locations with a pencil. Gently remove each screw along the upper wall
- Stick one Velcro strip in corner of the wall, on top of the first removed screw hole, and apply the screw back to the hole, to better adhere Velcro to camper wall. (The adhesive on the Velcro will stick to the wall, and replacing the wall screws through the Velcro strip, will ensure the Velcro can't pull away from the wall at a later date)
- Continue this process until Velcro is fastened to the other end of the camper wall. Cut off any excess Velcro unused
- Repeat process for the other side of the camper wall
- Please refer to our online video gallery on how to do this, and for further information and guidance
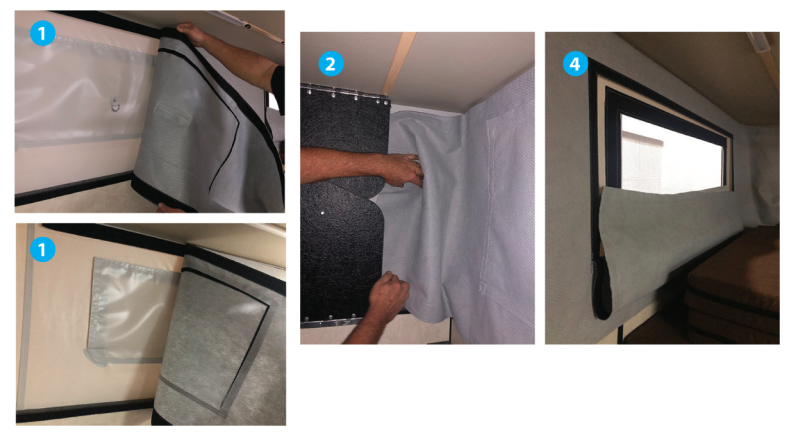
Applying the Thermal Pack
- Remove the Thermal Pack from its bag and unroll the panel. Align the window panel to the liner window. Press the two Velcro strips together at the top and then the bottom. Now roll the remainder of the panel out attaching the Velcro as you go
- An extra length of material is tucked behind the folding lift panel on both ends
- Check your window alignment and insure the upper and lower Velcro strips are fully secured
- To open the Thermal Pack for ventilation you would pull the Velcro free from the top of the Thermal Pack window panel. Fold the panel down as needed to open each window
- When lowering the roof to head home from your camping trip, you will need to close all the windows, attach the shock cords (bungee cords) between the inner privacy panels (window flaps on the pop-up portion of the camper) to help the liner fold to the inside
- The Thermal Pack does not need to be removed to operate the roof up or down. Most people only remove the Thermal Pack to maintenance the liner periodically