Preparing The Truck Bed For Installation Of The FWC Tacoma Bed Bar Brackets
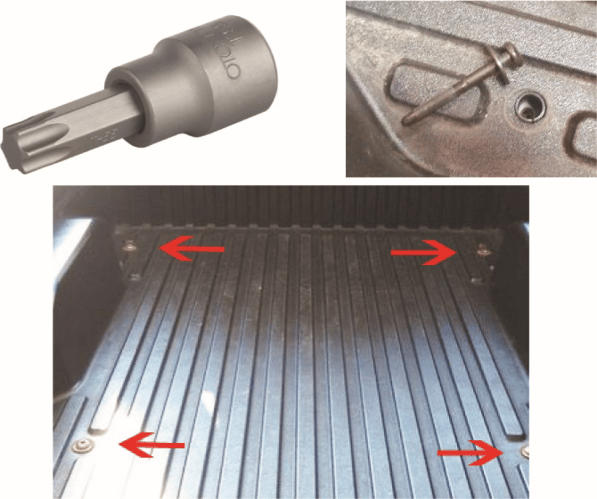
Step 1: Remove the 4 appropriate bed bolts in the truck bed so that you can install the custom made steel Tacoma bed bar brackets.
Step 2: You will need a T55 Torx Plus bit to remove the Toyota factory bed bolts. If you find the bed bolts rusted or stuck, try hitting the top of the bolt head(s) with a hammer a few times before loosening them. You can also use PB Blaster on rusted bed bolts. Spray the tops & then crawl underneath the truck with a flashlight, find the welded captive nuts on the frame (the part those bed bolts are threaded into) and generously spray them too. You can sometimes start loosening the bolts, and then when they stop or get difficult to loosen any further, you can spray on the top and let it drip down the threads. Use a hand tool when at all possible (regular 3/8 ratchet). It would be better to use a breaker bar to get the fastener started before you go to using an air tool. If there is going to be an issue with a rusted fastener, using an air tool right off the bat might get you into trouble fast. When reinserting the bolt and tightening them down, ALWAYS restart the fastener (bed bolt) by hand several threads before using any tool to drive it home the rest of the way.
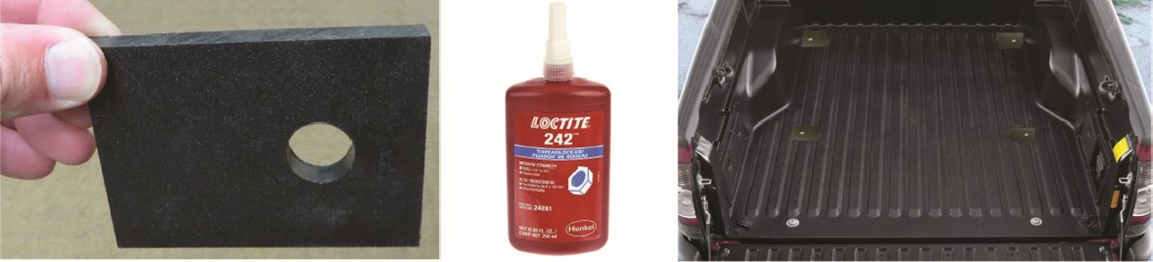
Step 3: Lay one small black plastic spacer over each bolt hole in the truck bed. Next, lay the black steel Tacoma Bed bars on top of the black plastic spacers, with the bolts holes lined up so that you can drop the Tacoma bed bolts back down into their original holes. The Tacoma Bed Bar Brackets are directional. The front bar should be placed so that the end of the brackets are facing forward & outward. The rear bar should be placed so that the ends of the bracket are facing reward & outward. The ears of the Tacoma bed bars should be parallel with the wheel well humps, as the photos below show. Before inserting and tightening the Tacoma bed bolts, apply a small amount of "BLUE" Thread locker Loctite to the threads of the bolts. You do NOT want to use the permanent Red Loctite. Or if you prefer, you can just use anti-seize on the bed bolts to keep them from rusting and to make getting bars off the truck one day that much more doable. Tighten and re-torque appropriately.
Front Bed Bar Direction Rear Bed Bar Direction
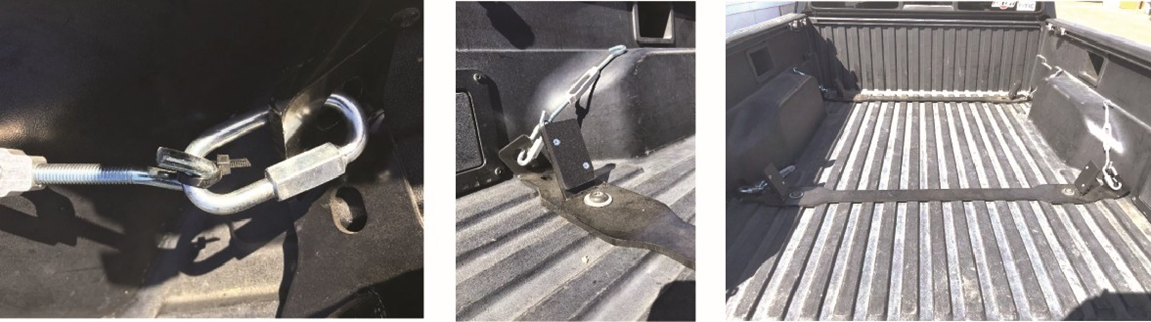
 Step 4: Install a Quick Link (rapid link) on the end of each Tacoma bed bar bracket. It is REQUIRED that you apply lock-tight on the rapid links, because if you don't they will spin open on washboard roads, even after short distances! It would be best to use the BLUE Loctite on any items you might want to come apart or remove at a later date. For any parts or items that you NEVER want to come apart, using the Red Loctite would be best.
Step 5: Lay the strips of rubber bed mat in front of, in the middle of, and behind the Tacoma bed bars.
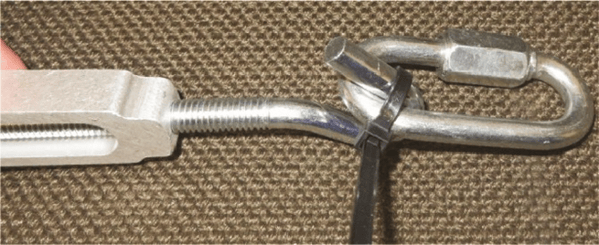
Step 6: Zip-tie each aluminum turn buckle to the Quick Link BEFORE you load the camper on the truck. This will make things simpler & easier getting the turn buckles started. Once the camper is mounted on the truck, there is not a lot of room to work in the truck bed for attaching the turn buckles. Having the turn buckle zip-tied to the quick links will allow you to attach the other end of the turn buckle to the camper and tighten them down a bit quicker.
Step 7: For further information, please watch our Tacoma install videos on our website or You Tube Channel.