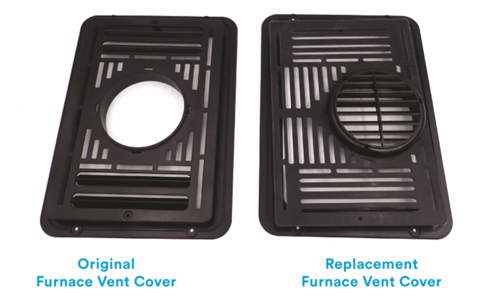
Increased air flow can help furnace performance, particularly at higher altitudes. To increase air flow, we have designed replacement vent covers that straighten the ducting path. We can send these vent covers to you.
Determine Correct Replacement Vent Cover
Step 1: Remove the furnace vent cover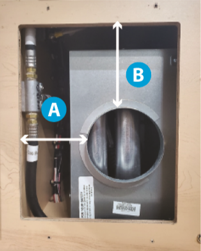
Step 2: Measure the distance between the left side frame to the left of duct opening (see photo A)
Step 3: Measure the distance between the top of frame to the top of duct opening (see photo B). This provides the vertical offset measurement
Step 4: Provide these measurements to FWC service department to acquire replacement vent part. Send to svc2@fourwh.com
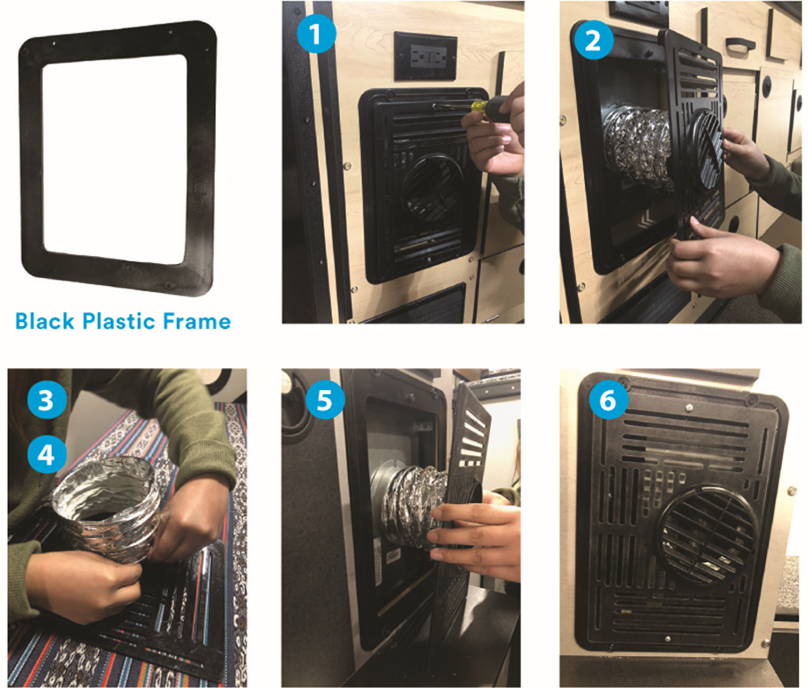
Install New Replacement Furnace Vent Cover
Step 1: Remove the original black plastic furnace vent cover
Step 2: for NON-Shell model campers - Keep the black plastic frame
Step 3: Remove the silver flexible ducting from the original vent cover
Step 4: Attach the silver flexible ducting to the replacement vent cover
Step 5: Straighten the silver flexible ducting and remount vent cover to black frame with two screws
Step 6: Install complete
Questions: Contact svc2@fourwh.com