Installation & User Guide: Swift & Raven
Tools Required:
Power Drill, 1/8” drill bit, No. 2 Phillips Bit, Tape Measure, Pencil, Scissors, Tape, and the Actuator Kit.
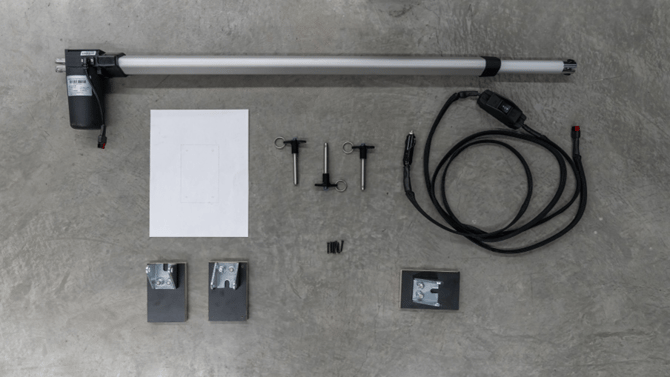
Actuator Kit Includes:
-
Lift Actuator (1)
- 12v Connection and Switch (1)
- Rear Pushboard Roof Mounting Plate (1)
- Front Pushboard Roof Mounting Plate (1)
- Floor Mounting Plate (1)
- Mounting Drill Guide (1)
- Phillips Screws (8)
- Push Pins (3)
Installation Instructions
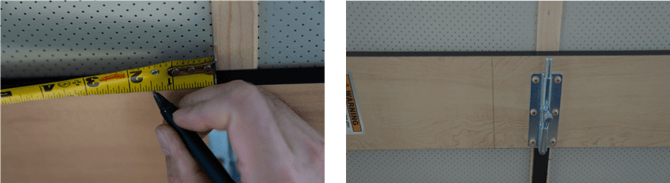
Step 1:
Facing the camper door, measure & mark 1.5 inches away from the center roof trim towards the passenger side of the vehicle on the rear pushboard.
Step 2:
Cut out Mounting Drill Guide (f) and tape the drill guide on the wooden pushboard lining up lenghtwise with the marked line in Step 1.
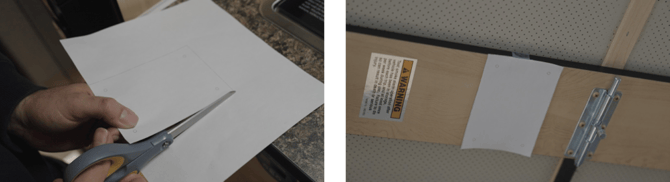
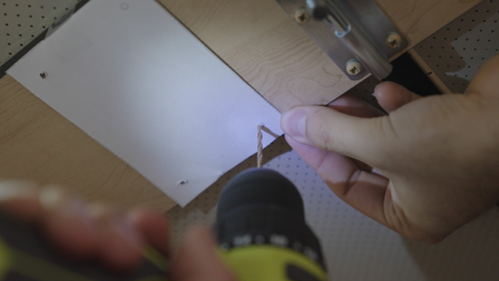
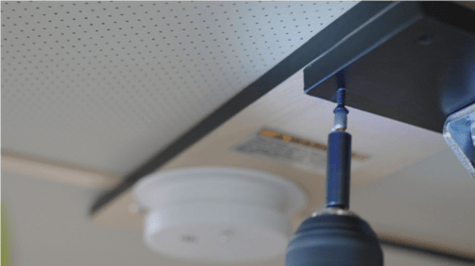
Step 3:
Pre drill the holes in the Mounting Drill Guide (f) using a 1/8” bit into the 1/2 inch pushboard.
(DO NOT DRILL PAST 1/2in ROOF DAMAGE WILL OCCUR)
Step 4:
Remove the vhb tape lining on Rear Pushboard Roof Mounting Plate (c) and stick in the proper orientation (see graphic below), lining up with the holes drilled in Step 3.
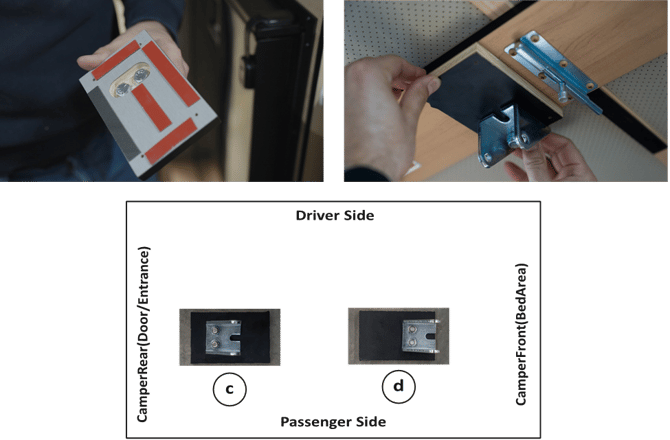
Step 5:
Screw in the Rear Pushboard Roof Mounting Plate (c) with 4 provided Phillips Screws (g) and repeat steps 1-5 for the Front Pushboard Roof Mounting Plate (d).
Operation Instructions
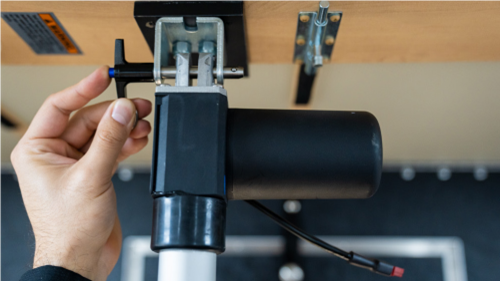
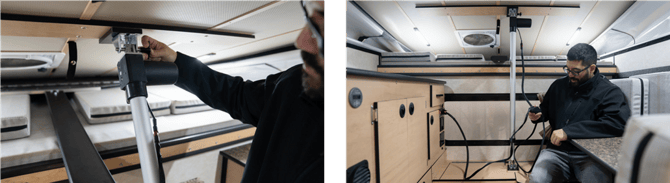
Step 1:
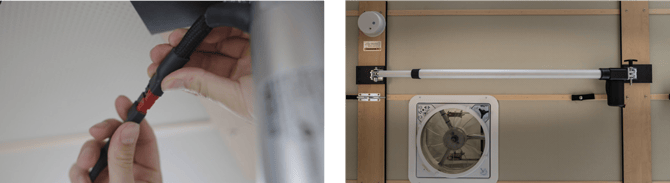
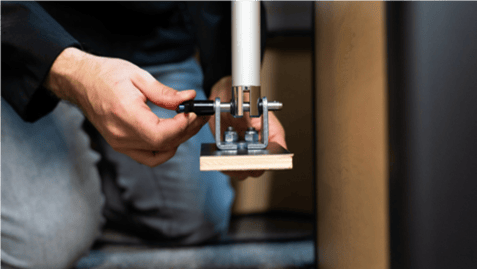
Secure the motor end of the Lift Actuator (a) to the Rear Pushboard Roof Mounting Plate (c) using 1 Push Pin (h) and let it hang down.
Step 2:
Attach the Floor Mounting Plate (e) to the hanging end of the Lift Actuator (a) using 1 Push Pin (h).
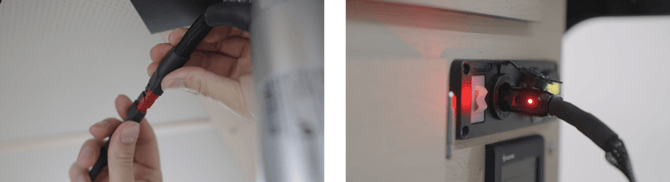
Step 3:
Connect the 12v Connection and Switch (b) to the Lift Actuator (a) and plug in to your campers 12v socket.
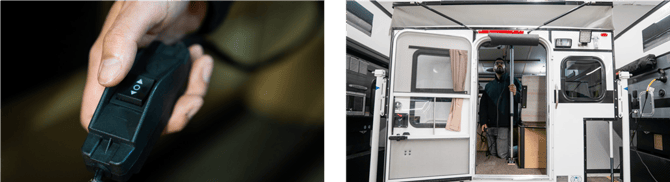
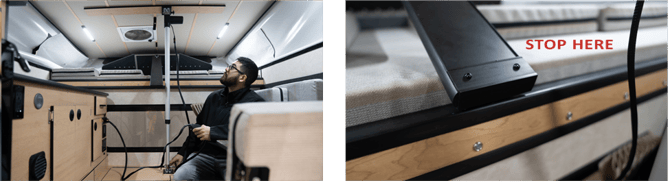
Step 4:
Press the down button on the 12v Connection and Switch (b) and watch your roof raise!
(DO NOT OVER EXTEND ACTUATOR OR ROOF DAMAGE MAY OCCUR)
Step 5:
When roof is nearly up, let go of the switch and finish popping your rear camper panel into place. Secure with strap and button.
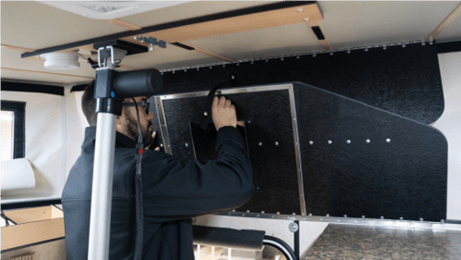
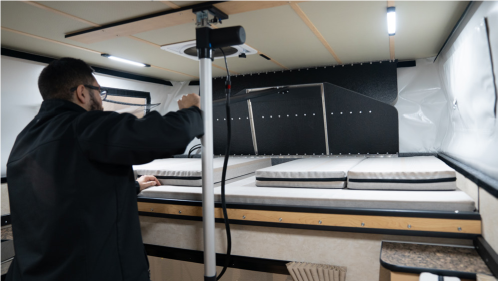
Step 6:
Move and mount the Lift Actuator (a) to the Front Pushboard Roof Mounting Plate (d) and secure with 1 Push Pin (h). Raise the Actuator (a) until it sits on the cabinet hanging straight down.
Step 7:
Press the down button on the 12v Connection and Switch (b) and watch your roof raise!
(DO NOT EXTEND TO FULL ROOF LIFT OR ROOF DAMAGE MAY OCCUR)
Step 8:
When roof is nearly up, let go of the switch and finish popping the front camper panel into place. Secure with strap and button.
Step 9:
Unplug the Lift Actuator (a) and stow on your roof by placing in each Mounting Plate (c,d) using 2 Push Pins (h).